10 Healthy Heart Foods You Should Know
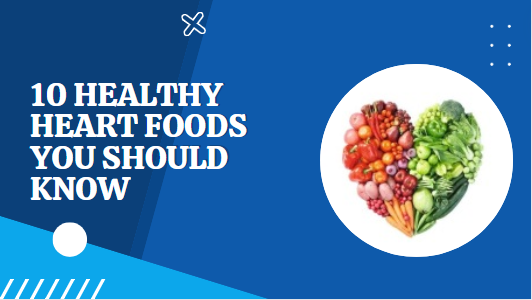
10 Healthy Heart Foods You Should Know: It has been estimated that nearly 6.9 million people in the US have coronary heart disease. CHD is the leading cause of death worldwide and accounts for roughly 2,800 deaths every day. You can do many things to help keep your heart healthy and disease-free you can schedule an annual checkup, exercise daily, quit smoking, or take steps to reduce the level of stress in your life.
All of these things can have a positive effect on heart health but one of the simplest lifestyle changes that will benefit your heart is watching what you eat. The CDC warns that eating foods high and fat cholesterol or sodium can harm the heart. So diet is a good place to start when taking steps to minimize the risk of heart disease. let’s learn about some of the best foods that can keep your heart strong and reduce the risk of heart disease as well.
Healthy Heart Foods: Almonds
Almonds are rich in many nutrients that can do wonders for your heart. Packed with heart-healthy monounsaturated fats they have the power to lower LDL or bad cholesterol levels reducing the risk of heart disease. Additionally, almonds contain fiber which aims to control blood sugar levels and maintain a healthy weight both of which are crucial aspects of heart health.
Vitamin E content in almonds acts as an antioxidant protecting your heart and blood vessels from oxidative stress. So next time you reach for a snack grab a handful of almonds to give your heart that extra boost it deserves.
Avocados
Avocados aren’t just delicious they’re heart-healthy as well packed with heart-loving monounsaturated fats this creamy green fruit can do wonders for your overall heart health. Many Studies have shown that the monounsaturated fats in avocados can lower bad cholesterol levels reducing the risk of heart disease. They’re a fantastic source of potassium which helps regulate your blood pressure a key player in maintaining a healthy heart.
Health Care
A study published in the Journal of Clinical Lipidology found that participants who ate one avocado a day experienced a significant decrease in LDL cholesterol levels which is a major risk factor for heart disease. But that’s not all avocados are also rich in fiber antioxidants and vitamins that support overall heart health.
Fiber helps control the amount of cholesterol that you consume while antioxidants fight inflammation and oxidative stress both of which could damage your heart. So whether you’re enjoying avocado toast guacamole or simply adding slices to your salad you’re giving your heart a tasty treat and a dose of heart-boosting nutrition.
Carrots
These vibrant orange veggies are packed with beta carotene a powerful antioxidant that our bodies convert into Vitamin A but what’s the heart connection? Well, Studies have shown that a diet rich in beta-carotene can significantly reduce the risk of developing heart disease and strokes. Most likely this is because beta katene helps protect your heart and blood vessels from oxidative stress and inflammation.
Additionally, it plays a crucial role in maintaining healthy blood pressure another key aspect of cardiovascular well-being. The fiber in carrots also contributes to these benefits by helping you manage your cholesterol levels. So when you munch on those crunchy carrot sticks not only are you satisfying snack Cravings but you’re also giving your heart a delicious Boost.
Green tea
What makes green tea so special are the antioxidants known as catechin. Studies have shown that regular consumption of green tea helps to lower bad or LDL cholesterol and reduces the risk of developing heart disease. Catechin also helps dilate blood vessels improving blood flow and potentially lowering blood pressure so by sipping on a cup of green tea you’re not just enjoying a delightful drink you’re also nurturing your heart too.
Garlic
Garlic has potent medicinal properties that help improve your heart health thanks to the presence of a compound called allisin which is believed to have many therapeutic effects. A meta-analysis of 12 trials noted that garlic supplements lowered both systolic and diastolic blood pressure and were as effective as a common prescription drug at reducing blood pressure. Garlic can also inhibit platelet buildup which can reduce the risk of artery-clogging due to blood clots and hence a lower risk of getting heart attacks and strokes.
Edamame
Edamame is a kind of immature soybean frequently found in Asian Cuisine. Like other soy products edamame is rich in soy isoflavones a type of flavonoid that may help lower cholesterol levels and improve heart health, Studies show that consuming soy protein regularly can potentially reduce the risk of developing heart disease.
A meta-analysis of 46 controlled clinical trials published in the American Journal of Clinical Nutrition concluded that soy protein intake was associated with a significant decrease in LDL cholesterol and triglycerides as well as a significant increase in HDL cholesterol. So if you want to keep your heart strong and overall healthy edamame seems like a great option.
Dark Chocolate
Dark chocolate is one of the most delicious foods that can be good for your heart in moderate quantities. Many experts now believe that dark chocolate offers protective benefits against atherosclerosis which happens when plaque builds up inside the arteries and increases the risk of getting heart attacks and strokes.
Studies show that dark chocolate prevents the arteries from hardening and prevents blood cells from sticking with each other and forming clots.
Fatty Fish and Fish Oil
They are packed with omega-3 fatty acids which are healthy kinds of fats that can do wonders for your overall health. Fatty fish like salmon, mackerel, Herring, sardines, and tuna contain two of the most powerful types of healthy fats EPA and DHA. These fatty acids work their magic by reducing cholesterol levels, reducing inflammation, enhancing blood vessel function, and even lowering the risk of irregular heart rhythms.
The research adds weight to these claims with studies showing that those who consume fish regularly have up to 25% lower risk of heart disease-related mortality while fish oil supplement takers may see up to 36% reduced risk of sudden cardiac death. The American Heart Association recommends two servings of fatty fish per week. You can also consider taking fish oil supplements if fish isn’t your thing.
Walnuts
A small handful of walnuts a day can lower your cholesterol and protect against inflammation. What sets walnuts apart is their exceptional omega-3 fatty acid content specifically alpha-linolenic acid. These healthy fats are renowned for their role in reducing inflammation improving blood vessel function and reducing the risk of heart disease.
Multiple studies have highlighted the heart-protective benefits of walnuts. For example, a review published in the American Journal of Clinical Nutrition found that incorporating walnuts into your diet can significantly reduce bad cholesterol levels another study suggested that regular Walnut consumption can lower the risk of heart disease by up to 29%.
Oatmeal
What makes oatmeal Stand Out is its high content of soluble fiber particularly betag glucans. this type of fiber has been extensively studied and has been shown to have a significant impact on heart health. it helps reduce levels of LDL or bad cholesterol lowering the risk of plaque buildup in the arteries which is a major contributor to heart disease.
A review of studies published in the American Journal of Lifestyle Medicine found that incorporating oats into a balanced diet can lead to reduced blood pressure improved blood sugar control and a lower risk of heart disease. So whether you prefer your oatmeal topped with berries, nuts, or a drizzle of honey you’re making a heart-smart choice every morning.